Step-by-Step Guide to Installing Trampoline Springs Properly
If you’ve recently bought a trampoline and are
quite confused about how to properly install the trampoline springs, then
you’re in the right part of the internet. We’re here to provide you with a
quick guide to ensure that the trampoline is safe and secure and can provide
hours of fun in the sun for you and your family.
Well, let’s not wait any further and read on this step-by-step guide to installing trampoline springs properly:
Measure your trampoline and springs first
The first step is to measure your trampoline’s diameter completely, including any extensions outside of the trampoline's circumference. This dimension should tell you how many springs are needed for installation. Also make sure to also determine what kind of coil or hook system works best for your setup before purchasing.
Assemble your spring tools
Once you know what type of spring and tool setup you need, it’s time to gather all the necessary parts before beginning installation. For most cases, this will include pliers, hex keys or screwdrivers, an adjustable wrench and wire cutters or snips (if needed). You may also want additional tools if you plan on replacing old, damaged parts such as scissors, scissors shears and stainless steel crimp/clamps.
Install each spring carefully
Now comes the important part: Installing each spring properly onto its corresponding mount point around your trampoline frame – you can do this by gently stretching it out about 1/4 inch from its relaxed state, while being careful not to overextend them too much on either side or pull them at an angle that isn't straight with the frame.
Why? This could damage them beyond repair or compromise safety. It helps if there is someone assisting during installation in order to hold tension on one side while you attach their mounting point. Once mounted correctly, make sure all screws are tight with an appropriately sized hex key or screwdriver head before proceeding further in your installation process.
Securely attach springs to mounting points
The next step is to attach each spring securely in place through its mounting points. Most modern outdoor frames have six points per spring located near where they touch when fully extended (top & bottom corners plus four sides). However, older models may require eight attachment points instead – but you can always contact the manufacturer if unsure which system applies first.
Then, secure each piece firmly using appropriate hardware such as self-tapping screws with washers, at least two inches apart, or snap-style clamps (loose enough allow some flex yet tight enough to prevent swaying). This would depend upon the type being attached together and make sure that no sharp edges are protruding where hands may come into contact during playtime activities as these could cause injury .
Finally, double check that all joints are locked tight using appropriate tools like pliers or adjustable wrenches after everything is connected. By doing this, you can ensure optimal performance from your new trampoline.
Best Springless Trampolines Australia
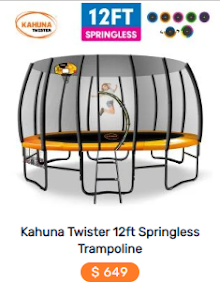
If you are someone who is not comfortable with having springs on your trampoline, then you can always opt for the springless ones.
Kahuna trampolines are designed with safety in mind and offer exceptional bounce, making them the ideal choice for anyone looking to purchase a springless trampoline. We are one of Australia's leading brands when it comes to springless trampolines and have been producing top quality products for years.
We sure that there's no stone unturned when it comes to making sure their springless trampolines are packed full of both fun and formidable recreational activities – after all this is what will make your outdoor activity a massive success!
Thanks to these innovative features, you’ll be able to enjoy all the benefits provided by our products while never compromising on safety or performance.


Comments
Post a Comment